How to Paint a Natural Fiber Rug
A Rug Rescue Story
Sometimes the best DIY projects begin with a mistake.
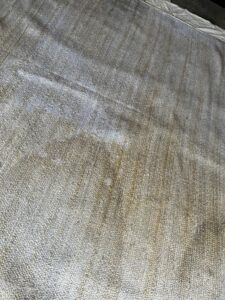
A few months ago, I purchased an 8′ x 10′ jute cotton natural fiber rug at an auction. It was advertised as new in the on-line catalog and I was thrilled when I won the rug for what I thought was a great bargain. I was so confident I didn’t open the box to check that it was actually new or not.
Well… lesson learned. This is what I found when I opened that box, what a mess!
After briefly considering putting it straight into the trash (and by briefly I mean weeks), I decided to see if I could save it instead. A little cleaning, some creativity, and quite a bit of paint later, this forgotten rug has become one of my favorite DIY transformations.
Today I’m sharing exactly how I gave this damaged rug a second life.
Supplies Used
- 8′ x 10′ jute cotton natural fiber rug
- Krylon Chalk Paint in Rusted Earth
- Fusion Mineral Paint in Champlain
- Fusion Mineral Paint in Seaside
- Valspar Cabinet & Furniture Paint in a custom peachy/pink
- Paint brushes in various sizes
- A Paint Roller and Tray
- Measuring tape
- Painter’s tape (optional but it does keep any striping straight)
- Water
- Vacuum and cleaning supplies
- Stencils
Step 1: Clean the Rug Thoroughly
Before any paint touched the rug, I gave it a good cleaning.
Because the rug had obvious dirt and discoloration, I vacuumed it thoroughly and then used mu carpet cleaning machine to clean up the stained areas as much as possible. Since this is a natural fiber rug, I was careful not to oversaturate it with water.
The bleach spots weren’t going anywhere, but thankfully paint would solve that problem later.
Tip: Always allow your rug to dry completely before painting.
Step 2: Plan Your Design
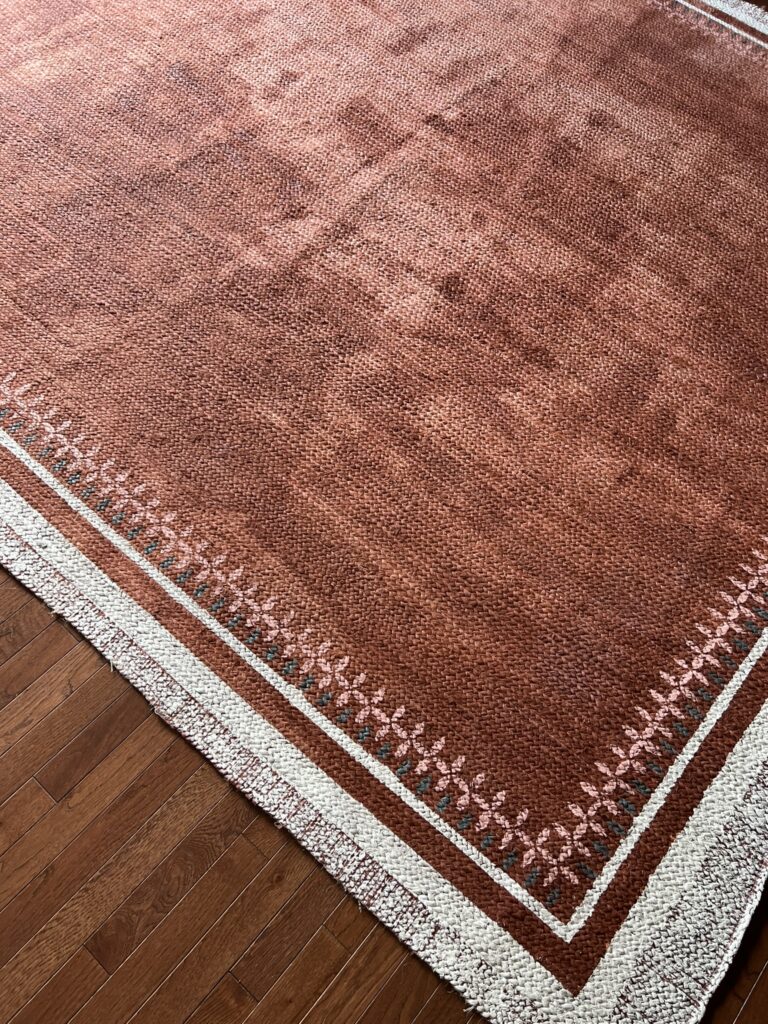
Since the rug already had a simple, natural texture, I decided to keep the design understated and classic.
I wanted something that would work with my dining room while adding warmth and character. The border design allowed me to disguise imperfections while giving the rug a custom, high-end look. Once I came up with a plan, I got to work.
Step 3: Mix the Base Color
For the main field of the rug, I used Krylon Chalk Paint in Rusted Earth.
To allow the natural texture of the jute to remain visible and to help the paint absorb evenly, I diluted the paint using:
1 part paint to 3 parts water
At first I tried rolling the paint mixture on, beginning at an edge and working my way down. Rolling, however, did not give me enough coverage so I switched to a 2 1/2″ brush instead, (a chip brush would work too) working my way in manageable sections until the I achieved the depth of color I wanted. Because this was a natural fiber rug and was thick, I did miss some spots and the brush made it easier to paint those spots.
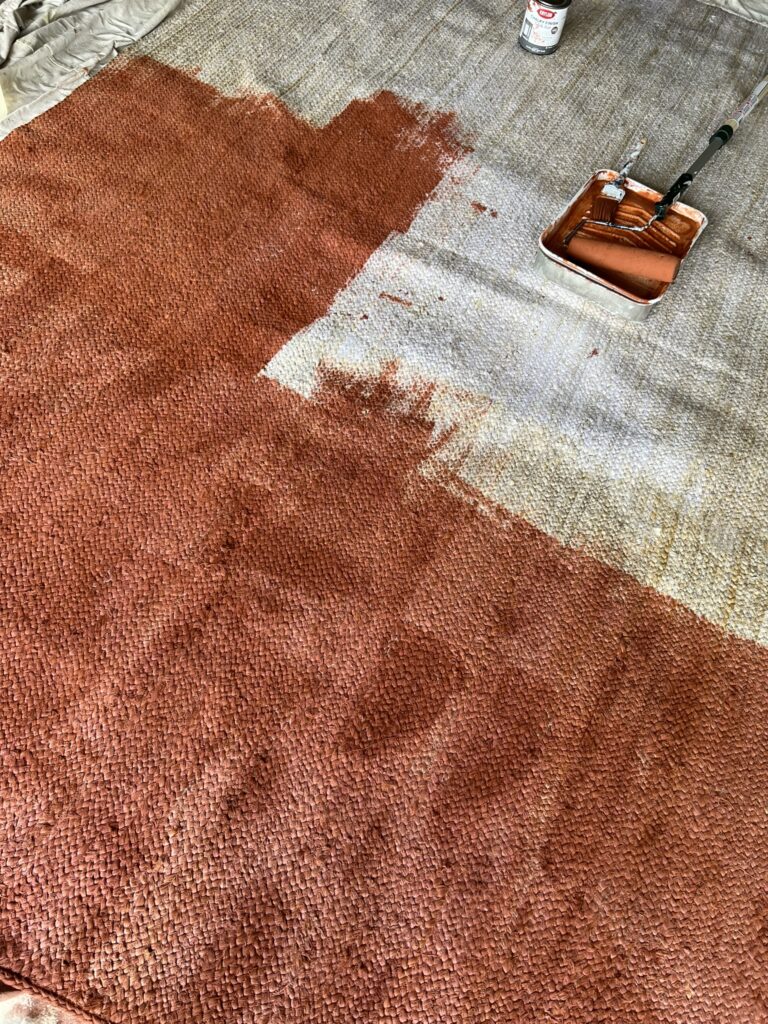
The watered-down paint created beautiful color variation while still allowing the woven texture to show through.
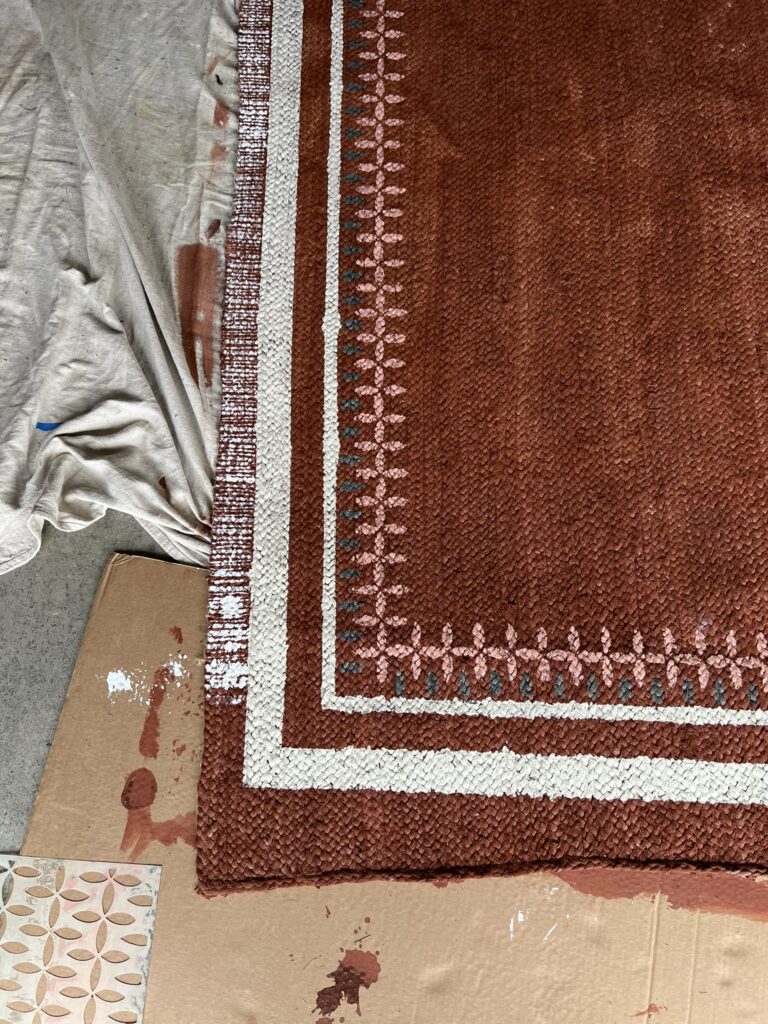
Step 4: Paint the Border
For the border details and because I was using stencils, I used paint at full strength. For this step I used paint and colors that were already in my stash. The colors that I used are listed below.
Colors used:
- Fusion Mineral Paint – Champlain
- Fusion Mineral Paint – Seaside
- Valspar Cabinet & Furniture Paint (a peachy/pink custom color from my stash)
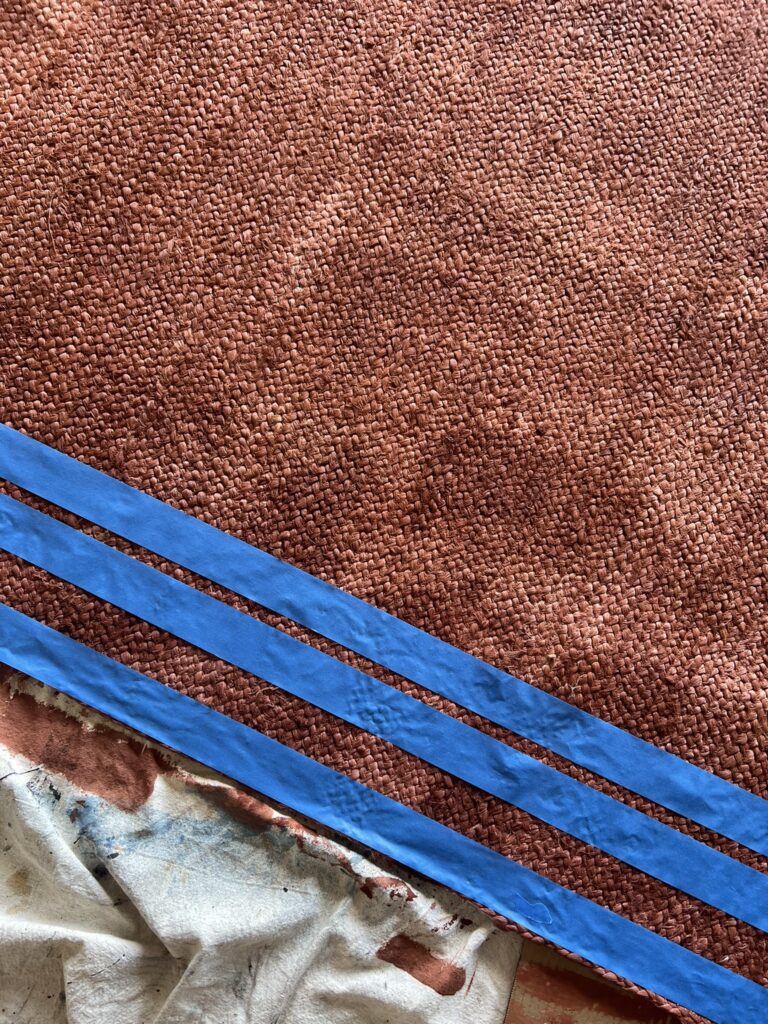
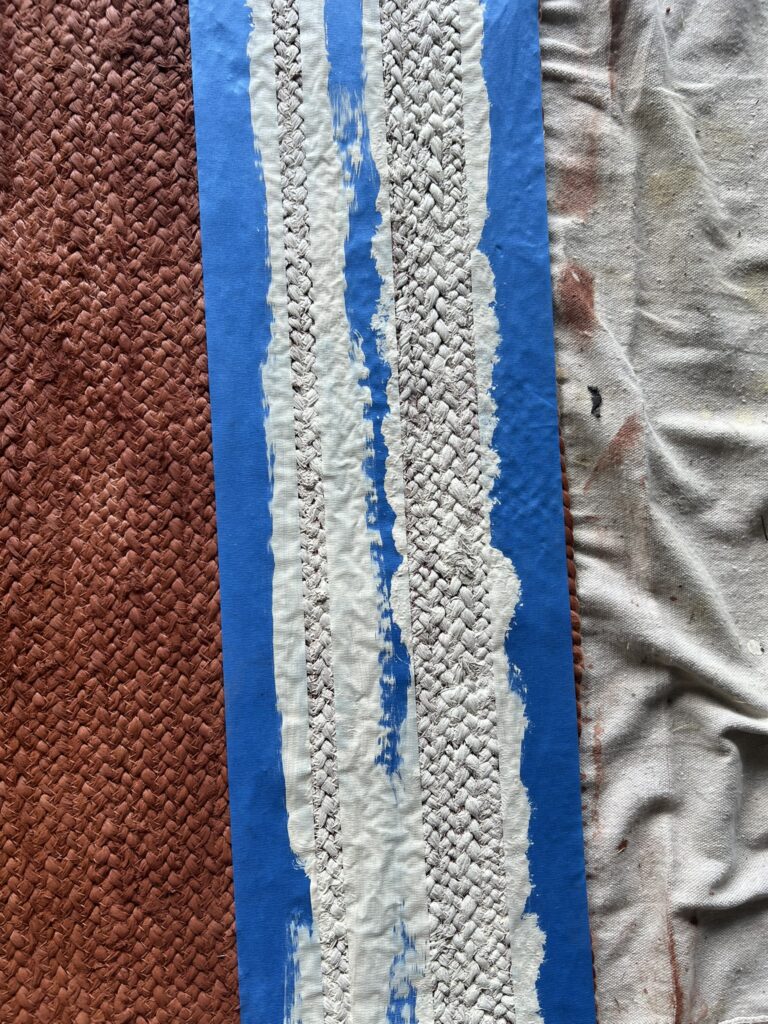
Because I would be painting stripes, I used painters tape to make them off so that I would have crisp lines and ample room for the stencils. This step was the most time consuming because the rug was uneven I had to measure very carefully so that my stripes would not be crooked.
I then painted the stripes with Fusion Mineral Paint in the color “Champlain”. One of my favorite parts of DIY projects is using supplies from my existing stash. There are no hard rules here—use what you have and make the design your own.
Once the stripes were painted and dried, I moved on to the stencils. Small accents and layered details added personality and helped create a finished look.
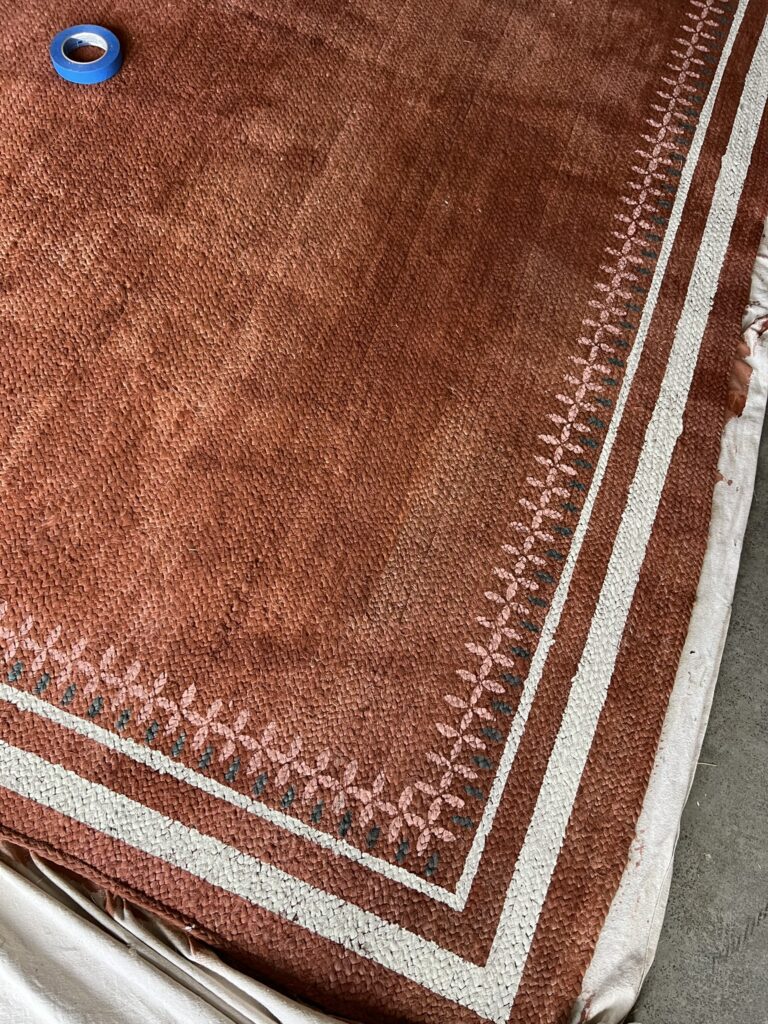
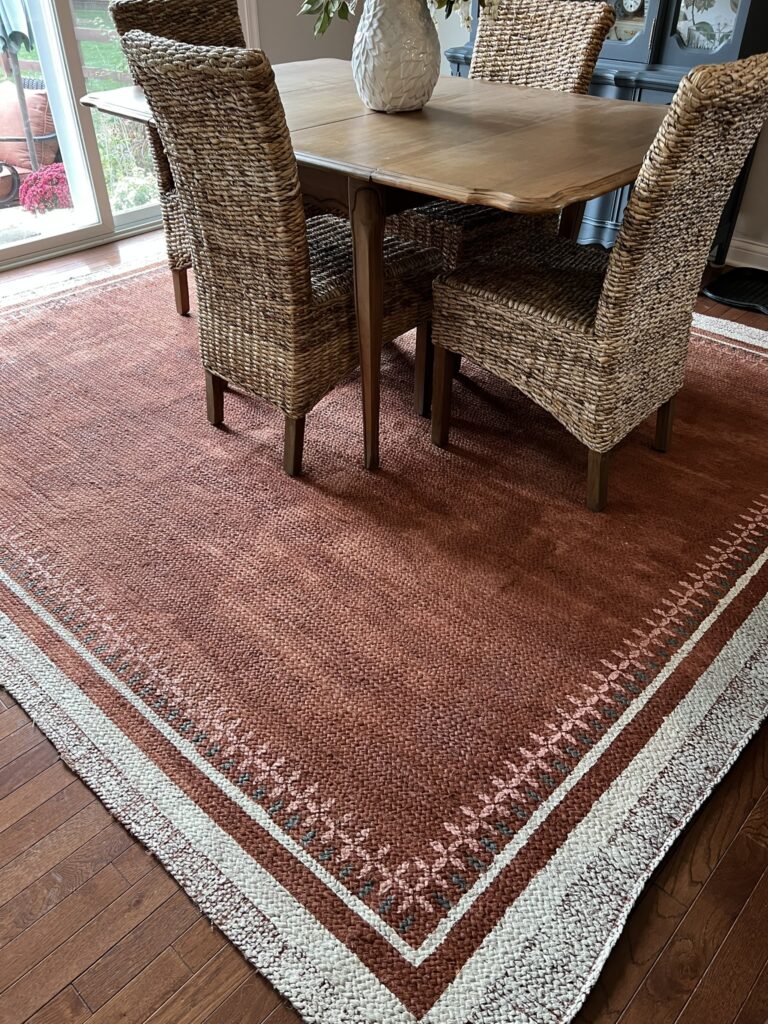
The Finished Rug
What started as a disappointing auction purchase ended up becoming a beautiful custom rug that works perfectly in my dining room.
More importantly, this project reminded me that sometimes the pieces that seem destined for the trash just need a little creativity.
Would I do it again? Absolutely. Will it hold up? We will see.
If you have an old rug that’s stained, faded, or simply doesn’t fit your style anymore, don’t be afraid to think outside the box. A little paint might be all it needs.
Have you ever rescued a thrifted or damaged home décor item? I’d love to hear about it in the comments!
Save This DIY for Later
If you love budget-friendly home décor projects, be sure to pin this post for future inspiration!